Sinbad and the Eye of the Tiger Ghouls

A still from the 1977 film.
A recent resin kit acquisition from eBay showing a scene from one of Ray Harryhausen's lesser efforts “Sindbad and the Eye of the Tiger” (1977) starring Patrick Wayne, John's son. The plot is very similar to “The Golden Voyage of Sinbad” (1973) and, now that I think about it “The 7th Voyage of Sinbad” (1958), (a personal favorite) , where Sinbad is on a quest to cure a loved one or someone of some importance that has had a spell or curse put one them. In “Tiger”, Sinbad has to restore a prince who has been turned into a baboon by an evil witch and it is a race against time to halt the transformation as the prince slowly becomes more and more baboon like in his behavior.
The quality of the animation is fairly standard for Harryhausen (which is still better than most on their best day) but the lackluster creatures and sleepwalking performances of the main characters would put the most attentive viewer to doze off.
Unfortunately, the most interesting creatures, the ghouls (as they are curiously called) appear roughly 10 minutes into the start of the film and are quickly dispatched by an avalanche of rolling logs. In any case, the sculpt of the three is another fine piece of work by Joe Laudati who should be the only one allowed to sculpt Ray's creatures IMHO.
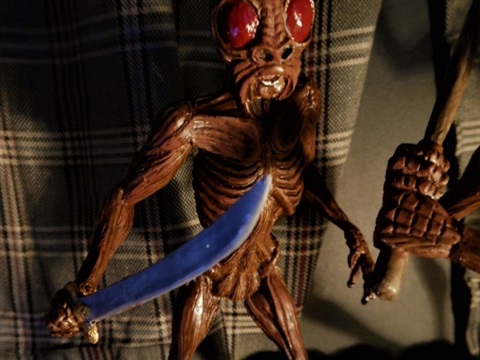
The cast is fairly clean requiring only a moderate amount of filing to clean off seam lines. Perhaps the most difficult part of the kit was to attach two of the ghoul's arms to the bodies because of awkward positioning of the hand's holding weapons. My solution (and I am sure there are better ones) was to drill holes at the shoulder joints and upper arms along with the intersection of the weapons shafts and hands.
I then pinned everything WITHOUT glue to see how they fit. Some pin holes had to be drilled larger to accommodate awkward angles at the joints but I finally got them to work. The trick is to work on one ghoul at a time until you are satisfied with the limb placement(s) and glue only one intersection at a time with a 5 minute epoxy which gives you a little leeway in positioning. Even cured, you can sometimes force the arm into a better position. I suggest using a soft metal for pining such as small finishing nails or even paper clips. Fortunately, all three of the ghouls had their legs attached to the torso so you don't have that to contend with.
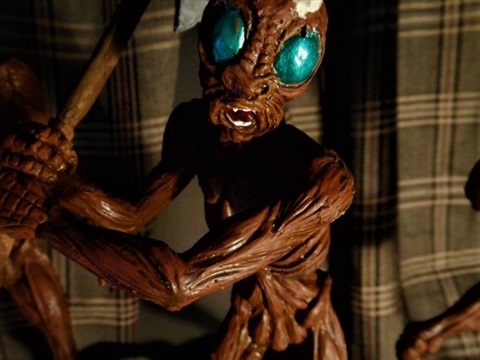
I went to Google to get the color palette for the monsters although the instructions suggest what you may want to do for a color scheme. After priming the three figures in dark gray, I rattle canned the figures with a light coat of satin boot brown followed by dry brushing with an acrylic yellow ochre. I then used the so-called dip method to bring out the subtle detailing on the creatures bodies with Rustoleum Walnut stain which worked pretty good despite the high gloss sheen it gives once dry. Since the monsters weren't shiny in the film I gave them a couple coats of matte lacquer from a rattle can. I painted each set of eyes metallic green, British crimson and black followed by a thick application of clear gloss for a wet look.

Another still from the film. Click to get a larger image.
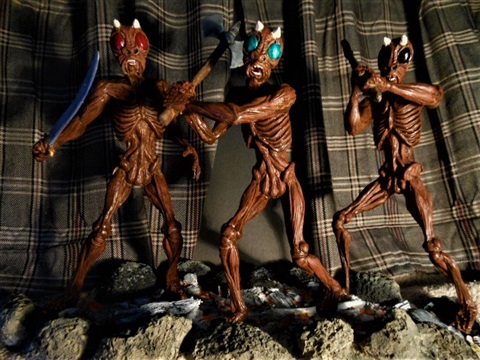
My version of the same scene. Unfortunately, I didn't have the FX budget to add real fire. Click to get a larger image.
The base is of the fire pit from which the creatures make their appearance in the film. The sculpt of the pit is an elongated ring of rocks with logs, sticks and ashes inside and roughly is thirteen by six inches. I painted the base with the dark gray primer and then most of the rocks a khaki brown. On the side of the rocks facing into the pit, I feathered flat black paint to look like soot deposits. I then applied a black wash to the outside of the rocks to tone them down a bit.
The pit itself was painted a flat white including all the debris inside. Once dry, I came back a laid down large yellow areas at random. Then I applied another random coat of florescent orange here and there so both white and yellow could be seen here and there. Then, using several shades of gray, I highlighted some of the wood pieces and debris to suggest chunks of wood burned to different degrees. Finally, I came back with a very light gray and dry brushed most of the interior allowing the yellow and orange to be exposed. If this sounds confusing, go to Google and do an image search to get an idea what you are trying to achieve. I'd suggest 'glowing coals' as a search starting point. I have to say I am very pleased with the way my pit came out.
The final step is to attach the ghouls to the base. The manufacturer's thoughtfully made depressions marked with a small 'x' to show their placement and by using the supplied drawing, you can figure out which ghoul goes where.
Overall, a very nice resin kit with a few wrinkles on the assembly part but if you're a fan of this film, you probably couldn't do much worse. 1/20/2019
Click to get a larger image.
Click to get a larger image.

Click to get a larger image.

I'm pleased with the way the fire pit came out. Unfortunately, the shot is a bit washed out. Click to get a larger image.
Comments
joanne
20.01.2019 18:26
Excellent job once again! you are amazing!
Latest comments
18.07 | 20:43
Speechless, And I am really speechless.
Incredible work. I am glad we could provide you with a grail
11.07 | 11:41
Great job down to the last detail!
10.07 | 16:36
Thank you, Addis, I estimate it took me around 100 hours to complete.
10.07 | 12:24
Terrific work...must've taken quite a while for you to complete...very good detail!!
Share this page