Polar Lights B-9 Robot & Dr Zachery Smith Buildup

Box art for the 1999 kit.
Lost In Space was an American science fiction series that aired on television from 1965 to 1968 from Irwin Allen the creator of similar series during the period, one of the more famous being 'Voyage To The Bottom Of The Sea'. The basic premise of LIS was modeled after a 1812 novel where a family is shipwrecked on a tropical island and their efforts to survive there called 'The Swiss Family Robinson'. In this updated retelling of the story, the Robinsons are marooned in space due to the nefarious actions of a saboteur, Dr. Zachary Smith, who is also stranded on board although the Robinsons are unaware of his part in their plight.
Though I love science fiction, I was never a big fan of this series, primarily because it got pretty silly as the five season show progressed. Initially, Smith was a very threatening (albeit cowardly) character and if they had maintained that tone, I probably would have enjoyed the various episodes more that I had. As it turned out, Smith became a pompous buffoon who the B-9 robot (nicely designed by the man who brought us Robbie the Robot from 'Forbidden Planet' Robert Kinoshita with others) eventually evolved into becoming the straight man for Smith. On a side note, the series' music was composed by a 'Johnny' Williams who would later be nominated for fifty-one (!!!) Oscars and winner of five for some of the most iconic film scores in history, not the least of which is 'Star Wars' trilogy.
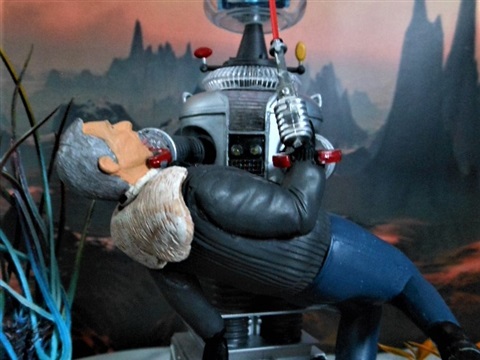
In any case, when I stumble across this kit by Polar Lights featuring the aforementioned duo, my mind burned with the idea to show a scene that I had longed to see but, alas, never came to be. That scene would be B-9 dispatching Dr. Smith in some fashion or another in flagrant disregard of Issac Asimov's First Law of Robotics. As much as I would have liked a gory end to the good doctor, I settled on a cheap and efficient strangulation. We are talking about a robot killing someone, now aren't we?
Front shot of the kit. No lights are on at this point. Click for a larger image.
Side shot of the kit. No lights are on at this point. Click for a larger image.
Rear shot of the kit. No lights are on at this point. Click for a larger image.
The first step was to kitbash the Dr. Smith part of the kit in such a way as to suggest he'd just been snatched off his feet by the robot who'd finally had enough. I cut wedges of plastic from the back of the legs at the knees and, then using a heat gun, heating up the plastic enough so could bend the legs backwards into a position I liked. I finished the legs with modeling paste to fill any gaps and the like until I got a shape I was happy with. I similarly cut a small wedge out of Smith's head at the mouth to suggest him making that “gawk” sound we've all seen in comic books of people in similar situations. I further cleaned it out with a hobby knife to accommodate a extended tongue made from two part epoxy clay.
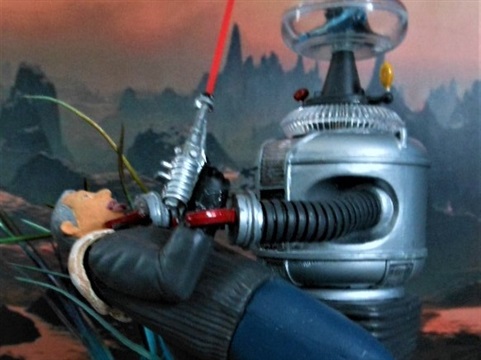
Next I cut off his left arm and repositioned it slightly behind the torso and moved the right arm slightly forward. In both cases, I filed (and filled) any gaps with modeling paste. After the paint job was completed, I drilled out the ray gun and added a short section of transparent orange styrene rod to look like a laser blast coming out of the just discharged weapon.
B-9 was an different matter entirely. Aside of some adding light supports inside his body, I left hime pretty much alone, the only change being with his arms.
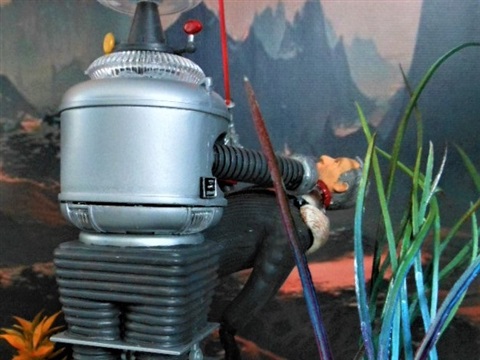
The kit's robot arms were way too short to even attempt what I wanted to do although the metal claws were fine. I came up with the idea of using 10mm flexible conduit tubing used to protect exposed wiring in cars and the like. I had to buy two meters (about six feet) of the stuff but it was only eight bucks or so with free shipping on eBay. I inserted short lengths of stiff wire inside each arm to maintain the curve I wanted for the B-9 pose. On one end of each, I epoxied rubber faucet washers to look like the robot's 'wrists' and installed the claws. In the other end(s), I inserted a short length of wooden dowel that I trimmed down enough to insert into the arm cavities in the upper body and secured them with two part epoxy.
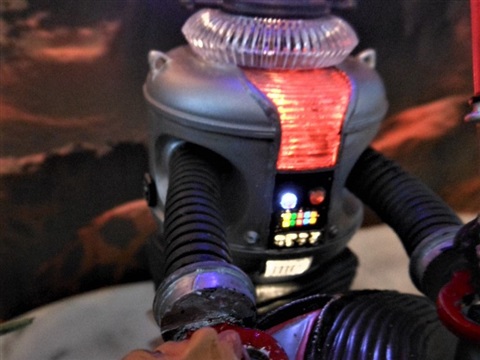
While all this was going on, I was working on the lighting. All the light sources were LED of one kind or another. Some were the always 'on' types, whereas others were flashers. The two bright white lights in the chest were flashers that cycled out of step after a minute or so which was a look I wanted. The multi-colored light cluster at the bottom of the chest is actually 16 fiber optic strands I ran back inside to their light source which were a pair of LEDs that produced a green, blue, red & yellow flash randomly. Perfect!
The upper chest light was a standard LED (always ON) that I gave a couple coats of clear red paint to get the hue that matched the TV show. The head had a clear triangular piece that painted dark gray all over accept where the 'eyes' would be. I inserted a blue LED I trimmed down to fit into the mounting hole for that part and assembled the rest of the head according to the kit's instruction.
Finally, I managed to cram all this inside B-9 without breaking any wires which was a feat in itself. I hot glued a 9 volt battery holder in the based (which fit perfectly BTW) and installed a SPST on/off switch in the rear of the base to power this bad boy up. It worked!!

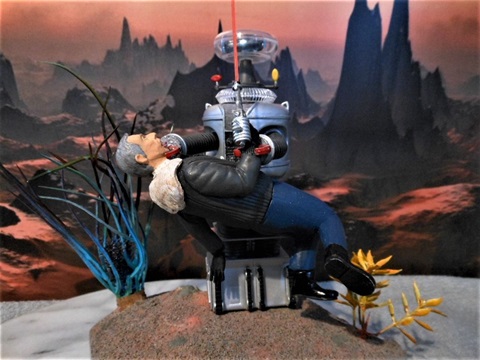
B-9 turned on. Unfortunately, due to the limitations of my camera, I got a lot of glare from the LEDs. In person it is more subdued. click for a larger image.

B-9 with his co-star, Will Robinson (billy Mumy), he who shall be warned! Click for a larger image.
A close up of Dr. Smith saying "Gawk!". Click for a larger image.
"Die, you pompous ass, die!"
Comments
Donna
13.02.2019 23:47
Congratulations on a job well done!
Latest comments
18.07 | 20:43
Speechless, And I am really speechless.
Incredible work. I am glad we could provide you with a grail
11.07 | 11:41
Great job down to the last detail!
10.07 | 16:36
Thank you, Addis, I estimate it took me around 100 hours to complete.
10.07 | 12:24
Terrific work...must've taken quite a while for you to complete...very good detail!!
Share this page